
A smooth craft show setup begins before shoppers reach your booth. Wreaths need room to hang upright, protective handling during unloading, readable price tags and a checkout station that is ready when your first customer wants to buy.
This craft show setup checklist for wreath sellers walks you through the order of operations—from checking your assigned space to hanging the last wreath and taking your opening-day photos. You can adapt it for indoor markets, outdoor fall festivals and holiday craft fairs.
Quick Answer: Confirm your booth boundaries and event rules; assemble and secure canopy, racks, tables and hooks before unpacking wreaths; hang wreaths upright with visible prices; test payments; prepare packaging; and inspect the booth from the customer aisle before opening.
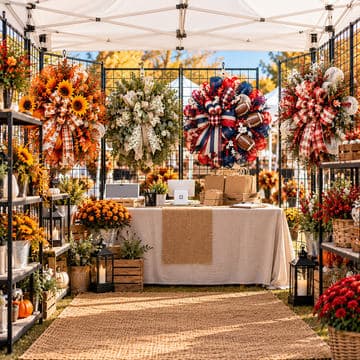
If you are still deciding what to pack, use our craft show packing checklist for wreath sellers. For the bigger picture, start with our Craft Show Success series. This guide concentrates on the setup process on show day.
Table of Contents
Check Your Assigned Booth Space Before Unloading
Walk the space before wheeling everything inside. Confirm the booth number, marked boundary, permitted display height, rules for attaching items to venue structures, electricity availability and any access restrictions. If you are outdoors, also note the direction of the sun and likely wind exposure.
Decide where customers will enter, where your wreaths will hang and where you will work at checkout. Keep accessible routes, fire exits, neighboring booths and required aisle clearances free of tables, signage and bags.
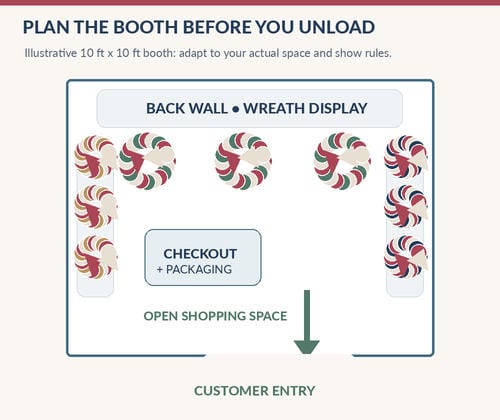
An illustrated 10-by-10-foot layout is only a planning example: check your actual measurements and organizer rules. Display plans should accommodate customers using mobility aids, strollers and larger shopping bags without crowding the aisle.
Follow a Setup Order That Protects Your Wreaths
When you unload all your finished wreaths first, they often end up sitting in the way while tables and grid panels are assembled. Bring out your structural pieces first, then unpack each wreath into its final display spot.
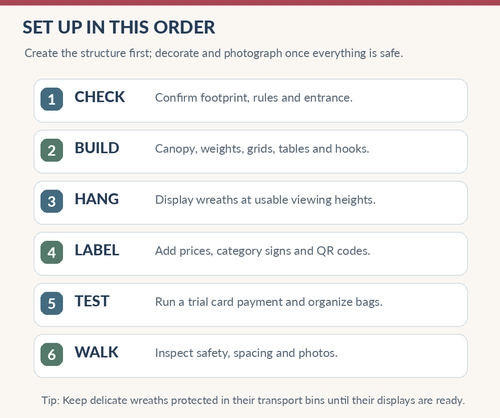
A Practical Craft Show Setup Sequence
- Inspect: mark your footprint and choose your entrance, main display wall and checkout location.
- Build: set up the canopy (if applicable), approved anchors or weights, tables, panels, racks and hooks.
- Hang: add finished wreaths by category, spreading pieces apart so the full design is visible.
- Label: check individual prices, shop signage and any payment or website QR codes.
- Prepare: organize bags and tags, test payments, and put repair tools where you can reach them.
- Inspect again: walk into the aisle to spot crooked wreaths, crowding and safety issues.
For advice on how to merchandise the space rather than only arrange its furniture, see our craft show booth display ideas.
Secure Canopies, Grid Walls and Display Racks
Wreaths are often lightweight, but tall grid walls, canopies and hanging displays can become unstable in windy weather or when a shopper bumps them. Outdoor setups should use the weights, anchoring methods and configurations required by the event and the equipment manufacturer.
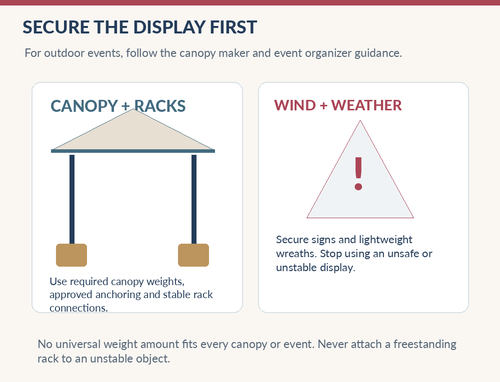
- Inspect legs, feet, panel connectors and locks for secure assembly.
- Use weights or anchors specified for your canopy and the event; there is no single universal weight requirement.
- Keep grid racks and freestanding displays on stable ground and within the assigned footprint.
- Secure loose signage, tablecloths and lighter decorations before wind picks up.
- Have a weather response plan. If the event or equipment becomes unsafe, close or dismantle the display as directed.
Avoid securing a display to railings, nearby tents or venue fixtures without permission. Stability is more important than squeezing in one more wreath.
Hang Wreaths Upright and Group Similar Designs Together
Upright wreaths are easier to see than pieces stacked on tables or left in bins. Hang your focal wreaths where they will catch attention from the aisle, but place all inventory within a safe and comfortable viewing range rather than building an overloaded top row.
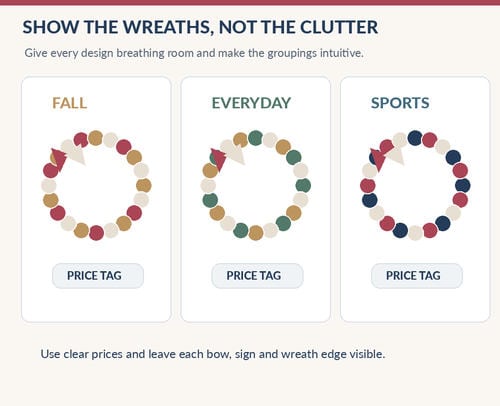
Try grouping your designs by fall and holiday, everyday and sports or team colors. Adjust those categories to match the season and the inventory you actually brought. Leave enough room around each wreath for shoppers to see ribbons, signs and floral accents without everything blending together.
Do not hang wreaths from decorations, bows or fragile embellishments. Use appropriate, secure hangers attached to the structural frame or intended hanging point. If a design sells, bring out a protected backup rather than starting the day with an overcrowded rack.
Still planning your product mix? Our guide on how many wreaths to bring to a craft show explains how to balance display capacity with backstock.
Add Clearly Visible Prices and Easy-to-Read Shop Signs
A customer should be able to tell what you sell, find a wreath price and locate checkout without asking. Attach a simple tag to each wreath; test that the tag is readable but not hiding the design or catching on mesh or ribbon.

- A shop-name banner or sign positioned within permitted display boundaries.
- Individual price tags on every wreath, including one-of-a-kind pieces.
- A payment-method sign, without promising a method that is unavailable that day.
- A website or follow-up QR code tested on a phone.
- Custom-order information only if you actually accept orders and can explain the terms.
Use the prices you calculated ahead of time. If you need help with profit and event expenses, see our craft show pricing strategy for wreath sellers.
Set Up Checkout and Packaging Before the Show Opens
Keep your checkout table clear enough to handle a payment and safely set down a sold wreath. Put larger wreath bags and protective materials under or behind the table—not across the customer walkway.
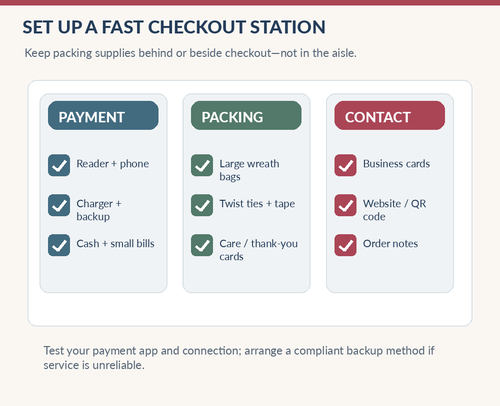
Charge your phone or tablet, connect the card reader, open the payment app and verify that it works at that venue. Bring the cash change you need, a charged backup power bank, receipts or order notes if you use them, and an alternative method for handling a temporary connection failure that complies with your payment provider.
For packaging, prepare appropriately sized clear wreath bags, closures, care cards, business cards and thank-you cards. A shopper carrying a wreath through a busy fall market will appreciate a well-planned handoff.
Keep a Small Repair Kit and Backstock Area Ready
A wreath may need to be fluffed after transport. Occasionally a bow shifts, a tag disappears or a lightweight accent loosens. Keep tools accessible, but store sharp tools, cords and adhesive equipment out of the customer area.
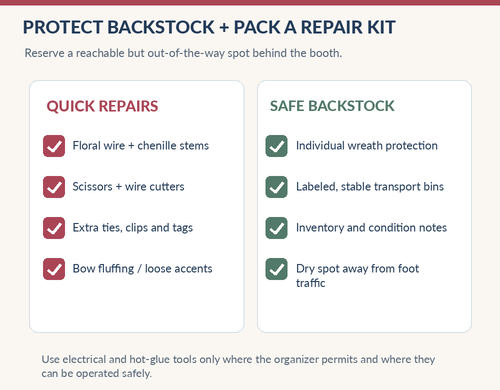
A compact repair kit might include floral wire, chenille stems, small zip ties, wire cutters, scissors, tape and spare price tags. If glue or other powered tools are allowed, use them only in a safe, organizer-approved area.
For your extra wreaths, use labeled bins or protective bags so mesh, bows and signs do not get crushed. Keep backstock dry, away from standing water, out of pedestrian paths and where it cannot topple into a customer aisle.
Take Photos Before Shoppers Arrive
Once your booth is fully set up and before the event gets busy, photograph it from the customer aisle. Take a wide photo of the entire booth plus closer photos of wreath groupings, checkout, price signs, and outdoor display supports.
These pictures give you marketing content for your website and social accounts, but they are also a record of what worked. After the show, compare the areas shoppers visited and the designs that sold with how the display looked. You can then improve your next booth layout instead of relying on memory.
Do Not Rush the Last Setup Checks
Allow enough time for a final review of tags, bags, payment connection, QR codes, lighting, walkway space, hooks, weights and repair tools. If you are running late, keep the booth safe and functional before adding optional decorations.
Outdoor sellers should check the event organizer’s weight requirements and the actual weather forecast. A tidy booth is helpful, but stable equipment and an unobstructed customer aisle matter more than squeezing in another wreath.
Complete a Final Walk-Through From the Customer Aisle
Once your booth is ready, leave the display for a moment and look at it as a first-time shopper would. That view reveals crooked wreaths, missing tags, hard-to-read signs and cramped walkways that are easy to miss from behind the checkout table.
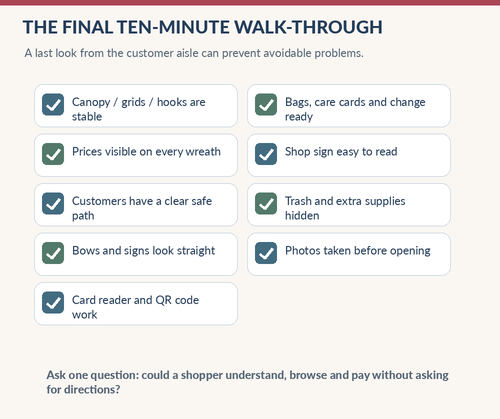
Before opening, check that displays and canopy are secure, all prices are visible, payments are ready, the walkway is unobstructed, packaging is within reach, and your best wreaths can be seen from the aisle.
Take a wide photo of the booth and a few close-ups of featured designs while everything is tidy. After the event, compare those images with what sold and what customers asked about. Our after-craft-show follow-up guide explains how to turn those notes into improvements for your next show.
Craft Show Setup Checklist: Final Thoughts
A professional booth does not have to be expensive or elaborate. The essentials are a secure setup, an easy shopping path, attractive upright wreath displays, transparent prices and checkout supplies that are ready before the first shopper arrives.
Use the same basic setup sequence each time and improve it as you learn. If you are planning your next event, review the rest of our Craft Show Success articles and our guide to common craft show mistakes.
Craft Show Setup Checklist FAQs
What should wreath sellers set up first at a craft show?
Start by checking booth boundaries and event rules. Then assemble and secure the canopy, grid walls, tables, hooks and other fixtures before unpacking finished wreaths. This keeps delicate wreaths protected while you build the display.
How early should I arrive to set up my booth?
Arrive during the event organizer’s permitted setup window and allow enough time to unload bulky displays, hang wreaths, tag inventory, test payments and do a final safety check. Ask the organizer about unloading routes and any hard cutoff before shoppers enter.
How should I arrange wreaths in a craft show booth?
Hang wreaths upright using secure hardware and group them by season, style or theme. Put eye-catching wreaths where customers can see them from the aisle and leave sufficient space between items so bows, signs and prices remain easy to see.
Do I need weights for an outdoor craft show canopy?
Outdoor events commonly require proper canopy weighting or anchoring. Follow your canopy manufacturer’s instructions and the organizer’s requirements for the specific conditions; do not rely on an arbitrary weight amount or unsecured racks.
What belongs at a craft show checkout station?
Keep a tested card reader and charged device, change for cash purchases, appropriate packaging, care cards, order notes if needed, and your business contact information within reach. Keep the customer aisle clear of bags and boxes.
Should I put price tags on every wreath?
Yes. Individual, readable tags help customers compare wreaths without having to ask for the price of each piece. Check that each tag is visible without covering the sign or bow, and make sure the amounts match your event pricing plan.
What should I check just before the show opens?
Walk to the aisle and verify display stability, visible price tags, clear walking space, tidy arrangements, working payment methods and ready-to-use packaging. Take opening photos while your booth is clean and fully stocked.