
Making holiday chair bows with wired ribbon is an easy way to coordinate a dining room, a party table, or a special event without buying decorations for every occasion. A full bow on the back of each chair can bring together a simple table runner, centerpiece, and place settings. Best of all, the same solid, striped, or metallic ribbon can be used again for wreaths, gift wrapping, sports-color gatherings, and everyday decorating.
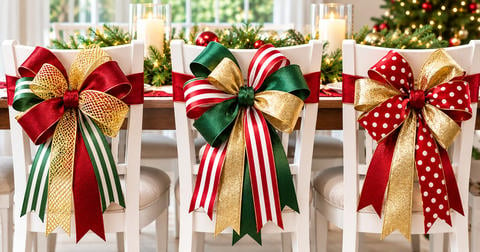
This practical guide explains how to measure a chair, make a layered wired-ribbon bow, attach it without damaging the chair, and estimate ribbon yardage before cutting. The photographs illustrate festive Christmas styling, while the method also works for Thanksgiving dinners, graduation celebrations, spring parties, and team-color events.
Quick Answer: For holiday chair bows, measure each chair back, choose 1.5″ or 2.5″ wired ribbon, and make a removable bow with four to six loops and two tails. Pinch and wire the bow securely, fluff the wired edges, and attach it to the chair using a soft ribbon band or an appropriate removable tie. Make one complete sample first, then measure how much ribbon it used before multiplying by the number of chairs.
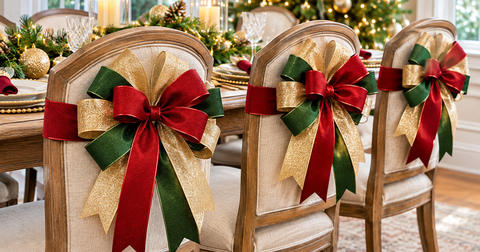
Table of Contents
Why Choose Wired Ribbon for Holiday Chair Bows?
Wired edges are useful when you want a bow that looks full from across the room. The thin wire along the edge helps each loop stay rounded instead of falling flat against the chair. If a bow becomes compressed while guests are moving around, it can often be fluffed back into shape.
A 2.5″ wired ribbon is a versatile main ribbon for many dining chairs. A 1.5″ wired ribbon adds contrast in smaller front loops or tails. For oversized chairs or a dramatic statement, some makers prefer a wider ribbon. Read our comparison of wired and non-wired ribbon to see why the construction matters as much as the color.
Start with two complementary colors and one optional metallic or neutral. You can browse ribbon for wreaths and bows or explore coordinating ribbon bundles for inspiration. You do not need ribbon printed with Christmas trees or holiday sayings; everyday reds, greens, golds, whites, checks, stripes, and metallics can create a festive result.
Holiday Chair Bows: Supplies You Need
- Wired ribbon: 1.5″ or 2.5″ for most chair bows; choose one main color and one optional coordinating accent.
- Sharp fabric or craft scissors: for clean ends and dovetail cuts.
- Measuring tape: to measure chair-back width, desired tails, and your finished sample.
- Floral wire or chenille stems: to hold the bow center securely; conceal and cover any sharp ends.
- A removable attachment: such as a soft ribbon band, non-scratching tie, or a reusable fastener suitable for the chair.
- Optional accents: a little coordinating deco mesh for an extra layer, or a small decorative pick or spray attached securely away from the seating area.
- Optional ribbon storage: a labeled bag or box to keep completed bows from flattening between events.
Chair compatibility matters. On smooth upholstered chairs, an adjustable ribbon band may work better than an exposed wire tie. On open slat-back or cross-back chairs, you can often secure the bow to an appropriate structural rail. Avoid adhesive, staples, exposed wire, and anything that could scratch wood, snag upholstery, or interfere with the chair’s normal use.
Measure the Chair Before Cutting Ribbon
Different chairs need different bow sizes. A six-inch-wide bow may overwhelm a narrow chair while disappearing on a very broad upholstered back. Instead of starting with a fixed yardage, measure the visible back area and the distance around the point where you plan to attach the bow.
- Chair-back width: measure the section you want the bow to occupy. For a balanced accent, consider a finished bow roughly one-third to one-half of that visible width.
- Attachment path: measure how far ribbon must travel around the chair or rail, allowing extra length to secure it neatly.
- Tail length: hold a sample tail against the chair. Short tails may be 8–12 inches; longer decorative tails may be 14–20 inches, depending on chair height.
- Clearance: sit in the chair and check whether the loops or tails touch the person’s back, catch under the seat, or interfere with moving the chair.
Measurements above are planning starting points, not strict sizing rules. If you are decorating a dozen or more chairs, make one complete test bow, adjust its proportions, and write down the exact length of ribbon used. That test is far more reliable than guessing from a photograph.
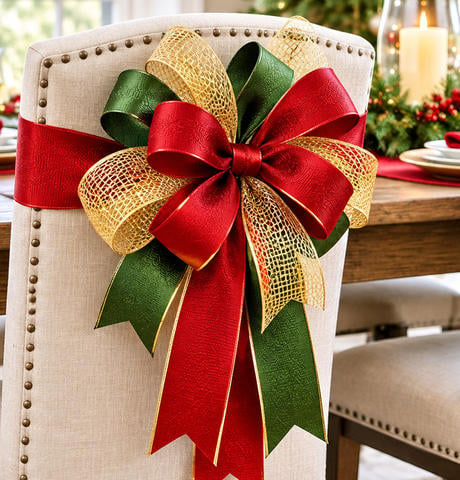
How to Make Holiday Chair Bows With Wired Ribbon: 8 Steps
Step 1: Choose a simple color combination
Pick one dominant ribbon color, one supporting color, and, if desired, one accent. For traditional Christmas dining, deep red with evergreen and a little metallic gold feels festive. To keep the bow from looking busy, use a solid as your largest loop layer and introduce stripe, check, or metallic ribbon in smaller quantities.
Step 2: Plan loop depth and tail length
For a medium dining chair, try a four- to six-loop bow with loops that extend about 4–6 inches from the center. Hold a ribbon sample against the chair before cutting. Decide whether the tails should finish high on the back or hang toward the seat; leave extra length until you are confident of the proportions.
Step 3: Make the first two loops
Leave enough ribbon for the first tail. Fold the ribbon into a loop on one side, pinch the center, then form a comparable loop on the other side. Keep the pinched centers aligned. If the ribbon has a decorative face, twist it at the center so the front of each loop faces outward.
Step 4: Add two to four more loops
Alternate sides to build a balanced bow. For a layered effect, add shorter loops of a second ribbon in front. Avoid making every loop exactly the same height; a small change in depth gives the finished bow dimension without making it messy.
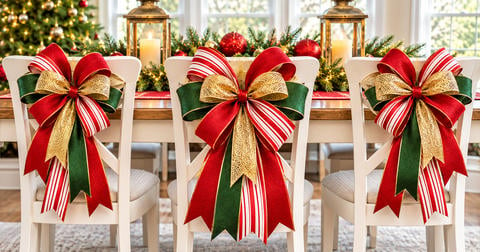
Step 5: Secure the center firmly
Compress the center in one hand and wrap it with floral wire or a chenille stem. Twist firmly enough to prevent movement but not so tightly that the ribbon gets crushed. Tuck or cover sharp wire ends. If your chair material is delicate, keep the wire entirely within the bow and use a soft separate attachment to hold the bow on the chair.
Step 6: Finish the tails and fluff
Open each loop with your fingers, curve the wired edges, and spread the colors so every layer is visible. Fold each tail lengthwise and cut diagonally from the folded edge outward for a neat V-shaped dovetail, or use straight cuts for a more tailored finish. Trim both tails after hanging the bow so you can judge the actual drop.
Step 7: Attach the bow without damaging the chair
For a chair with a sturdy upper rail, a soft ribbon tie may be enough. For an upholstered chair, a ribbon band can wrap around the back and carry the bow at the center. For slat-back chairs, choose a structural section where the tie cannot slip into a hinge or moving joint. Keep attachments away from guests’ backs, and do not tie anything around legs or use dragging tails that could become a trip hazard.
Step 8: Check comfort, alignment, and repeatability
Step back and see whether the bows sit at the same height. Sit down, push each chair in, and pull it out to confirm that nothing catches. Make a simple measuring guide or note the placement in inches so every additional chair can match the first one. This is especially helpful when several people are helping decorate before a party.
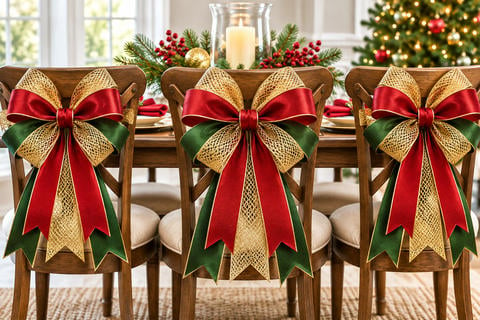
How Much Ribbon Do You Need for Holiday Chair Bows?
Ribbon needs depend on loop count, bow size, tail length, whether you use two ribbons, and whether you wrap a separate band around the chair. These are practical starting estimates, not a promise that one yardage works on every chair:
| Chair-bow style | Planning allowance per chair | Best use |
|---|---|---|
| Small, simple bow | About 2–3 yards | Narrow chair backs and short tails |
| Fuller wired-ribbon bow | About 3–4 yards | Medium chairs and four to six loops |
| Layered bow with a separate chair band | About 4–6 yards total across ribbons | Statement chair décor and mixed patterns |
Example for eight chairs: If your finished sample uses 3 yards per bow, eight bows require 24 yards. Adding roughly 15% for trimming and adjustments brings the allowance to 27.6 yards; plan around 30 yards. If your design also needs a separate wraparound band, measure and add that material separately. You can often buy wired ribbon in 10-yard rolls, but always check the specific product description.
A useful budgeting method is measured ribbon per finished sample × number of chairs + cutting buffer. Use the exact numbers from your test bow, especially if you are decorating twelve, twenty-four, or fifty chairs.
Holiday Chair Bows for Christmas, Thanksgiving, and Year-Round Events
You can reuse the same bow-making technique throughout the year by changing only the ribbon colors and a few optional accents. That is an easy way to get more value from versatile supplies rather than buying a different themed print for every event.
Christmas chair bows: classic or winter-neutral
Try red, evergreen, and gold for a traditional holiday dining room. For a softer winter look, use ivory, champagne, and silver. Simple stripes or metallic finishes can add personality without relying on a printed Christmas motif. Coordinate the bows with a table runner, napkins, or your tree ribbon so the whole room feels intentional.
Thanksgiving chair bows: copper and autumn warmth
Use burnt orange, chocolate brown, burgundy, copper, and cream. A copper metallic ribbon mixed with a rich solid color is especially attractive against wood furniture. These colors can work for fall birthdays and harvest gatherings too; you do not need pumpkin-print ribbon.
Spring and Easter chair bows: fresh, light colors
Try lavender with soft yellow, blush with cream, or sage with white. Two solid colors and a subtle check can feel fresh for a spring brunch, graduation party, or family celebration without bunny or egg-themed designs.
Summer and patriotic chair bows
Red, white, and navy wired ribbon works for a patriotic cookout, while blue and white or sunshine yellow and navy are appealing for casual summer gatherings. Make the bows smaller for outdoor furniture so they are easier to remove and store after the event.
Team-color chair bows for a football watch party
For game day, use two familiar team colors and one optional neutral. Solid, stripe, and check ribbons can signal the team palette without requiring logos or licensed patterns. Browse sports and team-color ribbon for color inspiration, and keep the same simple attachment method on dining chairs, folding chairs, or party seating.
Three Easier Alternatives to an Oversized Bow
1. A small single-ribbon bow
Use one wired ribbon and four modest loops. This is the fastest option for a long table with many chairs or a room where you want the centerpiece to stay the main focus.
2. A chair-back ribbon band with a detachable bow
Wrap a soft ribbon band around the chair and attach a separately made bow at the center. This lets you remove the bow and change colors for another celebration while keeping the base sizing the same.
3. A tiny deco mesh accent behind a wired bow
Gather a modest amount of coordinating mesh as a lightweight backdrop and attach it behind the bow. Mesh should not stick out into walking space or snag clothing. If you want a more delicate, wedding-style arrangement, read how to decorate wedding chairs with ribbon and deco mesh, which covers venue restrictions and quantity planning in more detail.
Common Chair-Bow Mistakes to Avoid
- Skipping the test chair: it can lead to wasted ribbon and an awkward fit. Make and photograph one bow first.
- Using too many patterns: combine a bold pattern with calmer solids for a clearer design.
- Tails that hang too low: trim them so they do not drag, catch under the chair, or become a tripping hazard.
- Exposed wire or scratchy fasteners: cover sharp ends and protect upholstery, wood and painted finishes.
- Attaching to unstable parts: avoid hinges, moving components, and areas that could interfere with chair use.
- Using open-flame candles beside loose ribbon: keep ribbon away from heat sources; the U.S. Fire Administration recommends flameless candles for winter-holiday decorating.
- Assuming all ribbon is washable: check fabric care and store bows dry and loosely packed.
How to Store Chair Bows for Reuse
After the gathering, gently remove each bow without yanking the attachment. Smooth the tails, fluff the loops, and allow any moisture to dry fully before storing. A shallow box or loose tissue between bows helps protect the wired edges. Label the ribbon color combination and the length of the chair band; you may be able to use the same set again for a holiday dinner, banquet, school event, or team party.
Do not stack heavy décor on top of completed bows. If they flatten, work one loop at a time to restore the shape. For more bow-making ideas, see how to make a sports wreath bow, how to make a large gift bow, and how to make a Christmas tree topper bow. Explore the free Wreath Maker Resource Center for additional ribbon, mesh, and decorating techniques.
Holiday Chair Bows: Frequently Asked Questions
How do you make a chair bow with wired ribbon?
Form four to six loops by pinching the ribbon at the center, secure the center with floral wire or a chenille stem, add tails, then fluff each loop and attach the bow to the chair with a non-damaging removable tie or ribbon band.
How much ribbon do I need for eight chair bows?
If your sample bow uses 3 yards, eight bows use 24 yards before a cutting buffer. About 30 yards would give you room for trimming. Add any separate chair-band yardage after you measure the actual backs.
What width of ribbon is best for chair bows?
Many makers start with 2.5″ wired ribbon for the main loops and use 1.5″ wired ribbon for smaller accent loops or contrasting tails. The right width depends on your chair size and desired effect.
How can I attach chair bows without damaging chairs?
Use a removable soft ribbon band or tie secured to an appropriate chair rail. Avoid adhesives, staples, uncovered wire, rough fasteners, and moving parts. Test on one chair before decorating the entire set.
Can I reuse holiday chair bows for other seasons?
Yes. Choose versatile solid, striped, checked, and metallic wired ribbons. Changing just the two main colors can adapt the same bow style for Thanksgiving, Christmas, spring entertaining, graduation parties, or sports celebrations.
Can I add deco mesh to a chair bow?
Yes. A small, gathered mesh accent can add fullness behind the wired loops. Avoid bulky mesh that rubs against guests, catches on the chair, or extends into walking areas.
Can I make the bows ahead of time?
Yes. Make a sample first, then assemble the bows before the event and store them loosely. Transport them in shallow containers so the loops do not become crushed, then refluff after installation.
Finish Your Holiday Chair Bows With a Consistent Color Plan
Beautiful holiday chair bows do not require elaborate printed ribbon or difficult techniques. Start with a measured sample, choose coordinating wired ribbon, build a balanced set of loops, and secure the bow comfortably to each chair. A repeatable design can make a dining room feel festive now—and the same versatile supplies can be reused for a completely different celebration later.
Ready to choose colors? Shop wired ribbon and everyday color combinations, or browse our seasonal and holiday decorating tutorials for more ideas.