
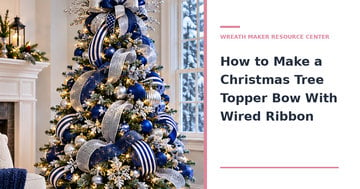
A Christmas tree topper bow can make an ordinary tree feel finished, whether you decorate in classic holiday colors or your favorite team’s colors. Wired ribbon is especially useful because its loops hold their shape, the tails can be curved through branches, and you can layer a bold ribbon with a quieter coordinating pattern. You do not need a complicated bow-making machine to create a full, balanced topper.
Quick Answer: Select two coordinating wired ribbons, make several even pairs of loops around a secure center, add shorter loops toward the front, and include separate tails if you want them to cascade. Tie the center firmly with floral wire or a suitable fastener. Fluff one loop at a time and attach the finished bow to a stable artificial-tree stem or support, keeping it clear of lights and electrical connections.
What Ribbon Works Best for a Christmas Tree Topper Bow?
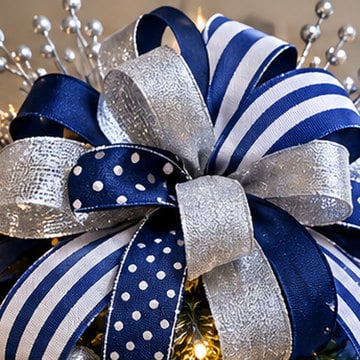
Wired-edge ribbon is the easiest choice for large bows because you can shape the edges and restore the loops after moving the bow. A 2.5-inch ribbon makes a strong main layer on many medium and large trees; a 1.5-inch coordinating ribbon adds detail without making the bow too thick. A narrower ribbon may be better on a slim tabletop tree. Choose colors and patterns that repeat decorations already in the tree.
For a sports-themed holiday tree, generic navy, gold, red, green, white, orange, or purple ribbon lets you build a recognizable team-color look without putting a logo on the bow. Browse ribbon for wreaths and crafts, ribbon bundles, and Christmas ribbon to compare patterns and widths.
Supplies You’ll Need to Make a Tree Topper Bow
- One wide wired ribbon in your dominant color or pattern.
- One coordinating wired ribbon, often a solid or stripe.
- Optional narrow metallic ribbon to provide contrast.
- Floral wire or suitable ribbon fastener to secure the bow center.
- Wire cutters and ribbon scissors.
- A stable artificial tree top or appropriate attachment support.
- Optional decorative picks, used only after the bow is secured.
The amount of ribbon depends on your loop size, number of loops, and tail length. Instead of assuming every topper needs a fixed number of yards, make a short practice loop and use the measuring method below. For decorating the rest of the tree, use our Christmas tree ribbon quantity guide.
How Big Should a Christmas Tree Topper Bow Be?
A good topper should look proportional from several feet away and sit securely at the top. A petite bow may disappear on a full seven-foot tree, while an extremely wide bow can overwhelm a slim tree or bend a weak top branch. Size the bow by the width of the upper tree, not just its overall height. Hold a sample loop near the top and decide whether it needs more width or fewer loops.
A ribbon topper can be built as a compact central bow with a few long tails, or as a dramatic layered bow with wider, shorter tails. Keep the visual weight near the secured center so the bow doesn’t lean forward.
How to Make a Christmas Tree Topper Bow: Step by Step
1. Pick one featured ribbon and one accent ribbon
Choose one visible pattern and pair it with solid or metallic ribbon. Keep your accent color consistent with the tree’s existing ornaments, ribbon, or picks. If the main ribbon has a busy design, let the supporting layer be simpler.
2. Measure and practice your first loop
Fold a section of ribbon into a loop, pinch the ribbon at the center, and hold it up near the tree. Adjust until it looks right from across the room. Record the amount of ribbon in that loop before making additional ones. This gives you a realistic material estimate for your specific topper.
3. Build matching loop pairs
Create one loop to the left and a similar loop to the right, pinching the ribbon at the center. Twist the ribbon at the pinch point when necessary so the decorative face remains outward. Repeat the pairs, rotating their angles slightly to build a rounded shape. Add enough loops to make the bow look full without becoming too heavy.
4. Layer a second ribbon toward the front
Use your supporting ribbon to make slightly shorter loop pairs. Nest them over the main ribbon rather than hiding the featured color. A simple alternating arrangement often looks more polished than packing in many different ribbon prints.
5. Secure the center and add tails
Hold the center firmly and wrap floral wire or another suitable fastener tightly around all layers. Test the bow by gently lifting it before releasing your grip. Cut tails separately if that gives you better control over length and placement; use neat angled cuts or fishtail ends. Fold or shape them through branches instead of letting every tail hang in a straight line.
6. Attach the bow to the tree
Use a stable artificial-tree stem, central top support, or manufacturer-approved attachment point. Wrap the fastening wire or ties securely without crushing fragile branches. Keep wire ends, ribbon, and decorations away from bulbs and electrical connections. Fluff each loop after the bow is in position, then spread the tails through the upper branches.
7. Add finishing accents only if needed
A few lightweight metallic picks can frame the bow, but they are optional. Repeat one of the colors in the bow farther down the tree so the top doesn’t look disconnected. If you want detailed guidance on finishing stems, see decorating a Christmas tree with picks and sprays.
Team-Color Christmas Tree Topper Bow Ideas
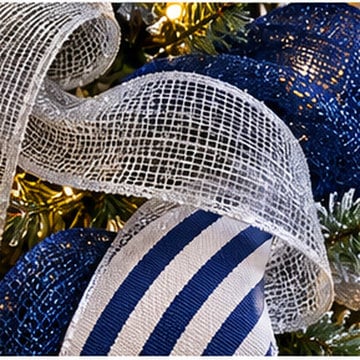
Navy and silver: Pair navy stripes with a white or silver metallic ribbon for a crisp, bright topper.
Red and black: Use red as the primary ribbon, black in a secondary loop layer, and a little silver or white to keep the bow from looking too dark.
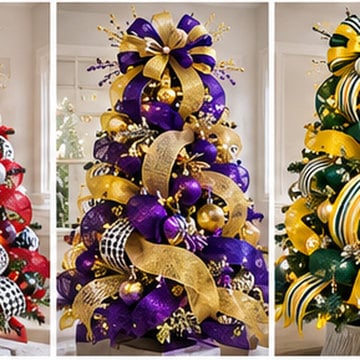
Purple and gold: Give purple most of the loop volume and place gold near the center and along a few tails.
Green and gold: Add green-and-white stripes over a gold textured ribbon for an energetic look.
These palettes also work for school-color trees, sports banquet centerpieces, and holiday displays. For more decorating ideas, see our existing guide to decorating a Christmas tree with deco mesh.
Common Mistakes When Making a Christmas Tree Topper Bow
- Loose center fastening: the loops sag unless all layers are secured firmly.
- Too much patterned ribbon: a busy bow can compete with ornaments and the rest of the tree.
- Identical loop angles: fan loops outward so the bow looks dimensional, not flat.
- Guessing ribbon yardage: test one loop and account for each pair and the tails.
- Attaching to a weak branch tip: secure to a stable support instead of relying on delicate greenery.
- Forgetting the final fluff: shape each loop after the bow is mounted to restore the intended fullness.
Shop Wired Ribbon and Bow-Making Supplies
Choose your base color from wired ribbon, narrow the palette with ribbon bundles, or browse Christmas ribbon for traditional holiday looks. You can reuse leftover ribbon for gift bows, wreaths, garlands, or smaller tabletop trees, making coordinated supplies useful throughout the season.
Christmas Tree Topper Bow: Frequently Asked Questions
What is the best width ribbon for a Christmas tree topper bow?
A 2.5-inch wired ribbon is a versatile starting point for many medium to large trees. Add a 1.5-inch ribbon as an accent or scale the whole bow down for a narrow tree.
How many yards of ribbon do I need for a tree topper bow?
There is no reliable universal number. Estimate ribbon for one loop, multiply by the number of loops, add tail lengths, and include a small allowance for finishing cuts.
Can I make a tree topper bow without a bow maker?
Yes. You can form loop pairs by hand, pinch the center firmly, and secure the finished layers with floral wire. A bow-making tool is optional.
How do I keep my tree topper bow from falling forward?
Keep the heaviest loops close to the center and fasten the bow to a stable tree support. A weak tip may need a different attachment point or a smaller bow.
Can I use two different ribbon patterns in one bow?
Yes, but two large prints can compete. One main pattern with a solid, stripe, or metallic accent is usually easier to coordinate.