
Learn to layer ribbon in a deco mesh wreath for defined color, pattern, and a dimensional finish.
One of the fastest ways to make a deco mesh wreath look finished is to layer ribbon with a clear purpose. Wide ribbon contributes bold color, narrow ribbon adds contrast, and repeating the same combinations creates a deliberate design instead of a jumble of loose ends.
This tutorial shows where to put ribbon, how to combine widths, and how to shape the finished layers. It is different from choosing ribbon colors or calculating the number of yards you need.

Quick Answer: To layer ribbon in a deco mesh wreath, make the mesh base first, choose one wide statement ribbon and one or two narrower coordinating ribbons, then pinch the ribbon tails into small bundles at the frame ties. Repeat the combinations around the wreath, angle the tails to create movement, and finish with a larger bow if desired.
Choose Ribbon Widths That Work Together
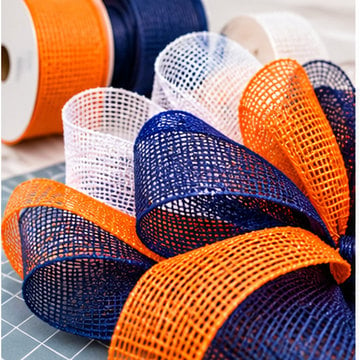
Start with wired ribbon in two different widths. A common pairing is a 2.5-inch ribbon as the wider statement layer and a 1.5-inch ribbon for contrast. These are examples, not strict rules; select proportions that fit the wreath size.
A good three-ribbon combination is one wide solid, one stripe or check, and one simple dotted or metallic accent. Patterns should feel related to the mesh and to each other.
Already have several rolls? Use the shop’s ribbon colors and patterns guide to decide which prints belong together before you cut them.
Build a Stable Deco Mesh Base First
Attach your deco mesh in poofs, curls, or ruffles using the tie points of your wreath frame. Keep the frame hidden but leave enough space to reach the ties again.
For a typical 24-inch finished wreath, a 14- to 16-inch wire frame or comparable work form is often a starting point. The size varies with the mesh technique and the finished fullness.
Do not force ribbon into an overfilled section. If you cannot see or access the frame ties, gently open the mesh rather than pulling the ribbon through at random.
Cut and Stack the Ribbon Tails
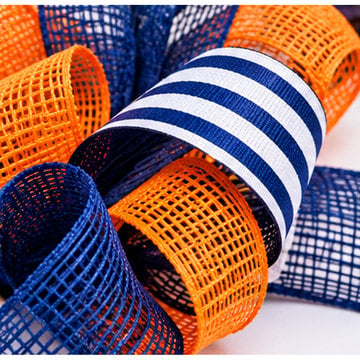
Cut two matching ribbon tails for each accent group. For many full wreaths, makers begin by testing a short piece around 12 to 14 inches; test the length against your frame and change it to suit the design before cutting an entire roll.
Lay the wider ribbon underneath the narrower accent ribbon, turn one slightly so both colors remain visible, then pinch the center together. Trim the tails with a neat dovetail or diagonal cut.
Make a small test bundle and hold it against the mesh. A narrow stripe should read as an accent, not disappear under the wider ribbon.
Attach Ribbon Bundles in a Repeating Rhythm
Secure a pinched bundle at a frame tie or with a chenille stem. Fan the tails in different directions so the ribbon breaks up the round shape instead of stacking into one stiff line.
Continue around the wreath with a rhythm such as wide solid plus narrow stripe, then wide patterned plus narrow solid. Repeat the same two or three combinations to give the eye familiar colors.
Stand back every few bundles. A wreath should have balance around the circle but does not need exact mirror symmetry.

Add a Large Bow Without Hiding the Layers
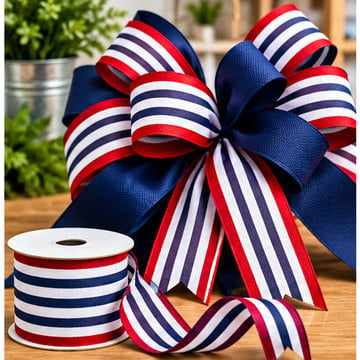
A large wired bow can anchor one side of the wreath. Combine the same ribbons used in the small bundles so the bow feels like part of the design.
Layer wide loops toward the back, narrower loops toward the front, and leave tails long enough to lead the eye back into the wreath. Bend the wired edges open instead of pressing loops flat.
Explore pre-made bows if you want a quick focal point, or browse wreath-making tools for the essentials used when making your own.
Check the Finished Wreath From the Front and Sides
Hold the wreath upright and look for places where all the ribbon tails point the same direction, where an accent color disappears, or where a wide ribbon covers a sign.
Fluff mesh that was flattened while adding ribbon. Trim any tails that hide the centerpiece and secure loose wires where they cannot scratch a door.
The final effect should show distinct layers: the mesh creates volume, the ribbon adds pattern, and a sign, bow, or ornament remains the focal point.
Shop Supplies for This Project
Shop wired ribbon, deco mesh, and wreath frames and forms for the base. Complete your project with wreath signs, ornaments, or coordinated wreath kits.
Frequently Asked Questions
Do I put ribbon on before or after the deco mesh?
Usually after the mesh foundation. The mesh provides the volume and lets you judge ribbon spacing.
Can I mix 2.5-inch and 1.5-inch wired ribbon?
Yes. That is a common pairing because the narrower ribbon creates contrast without hiding the wider one.
Does every tie need ribbon?
No. Use ribbon at enough points to create a balanced design; heavy bows or large signs may require fewer tails.
How do I prevent the ribbon from looking flat?
Pinch at the tie point, angle the ends, and shape the wired edges and loops outward.
Should the same patterns repeat around the wreath?
Yes. Repeating colors and patterns intentionally helps the design look cohesive rather than busy.
More free inspiration: Visit the Wreath Maker Resource Center for additional tutorials, supply guides, and decorating ideas.